
Introduction
Are you new to WordPress and looking for a reliable and user-friendly hosting provider? Cloudways hosting may be just what you need! In this article, we’ll guide you through the process of installing WordPress on Cloudways hosting in just 5 easy steps.
Why Choose Cloudways Hosting for WordPress?
Cloudways is a managed cloud hosting platform that provides a hassle-free experience in hosting your website. With Cloudways, you can easily launch your website and scale it as you grow.
Moreover, Cloudways offers a user-friendly interface that allows users to manage their server without any technical expertise. By choosing Cloudways for WordPress hosting, you can enjoy fast and reliable performance, easy-to-use control panel, and enhanced security.
Step 1: Sign Up for Cloudways Hosting and Choose Your Plan
To get started with Cloudways hosting, visit the Cloudways website and click on the “Get Started for Free” button. You will be prompted to fill in your email address, password, and name.
Once you have provided the necessary details, you can choose your hosting plan and server location. Cloudways offers a variety of hosting plans to fit your website’s needs, whether you’re just starting out or have a high-traffic website.
When choosing your server location, it’s important to consider your target audience’s location to ensure fast loading times and a better user experience. Cloudways has multiple data centres located around the world, allowing you to choose the server location that’s closest to your audience.
Step 2: Launch a New Server on Cloudways and Select Your Server Size
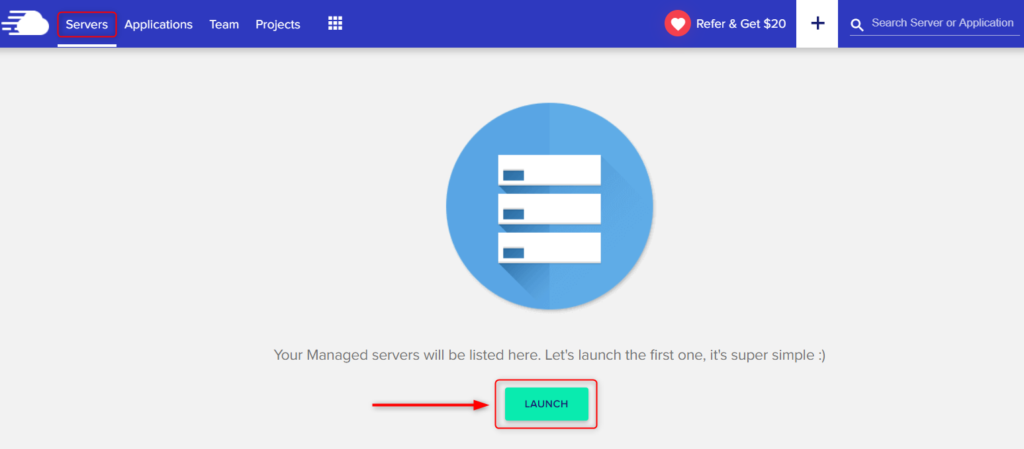
After signing up for Cloudways hosting, the next step is to launch a new server. This can be done by clicking on the “Launch” button and selecting your preferred cloud infrastructure provider and server size. Cloudways supports multiple cloud providers, including AWS, Google Cloud, DigitalOcean, Linode, and Vultr.
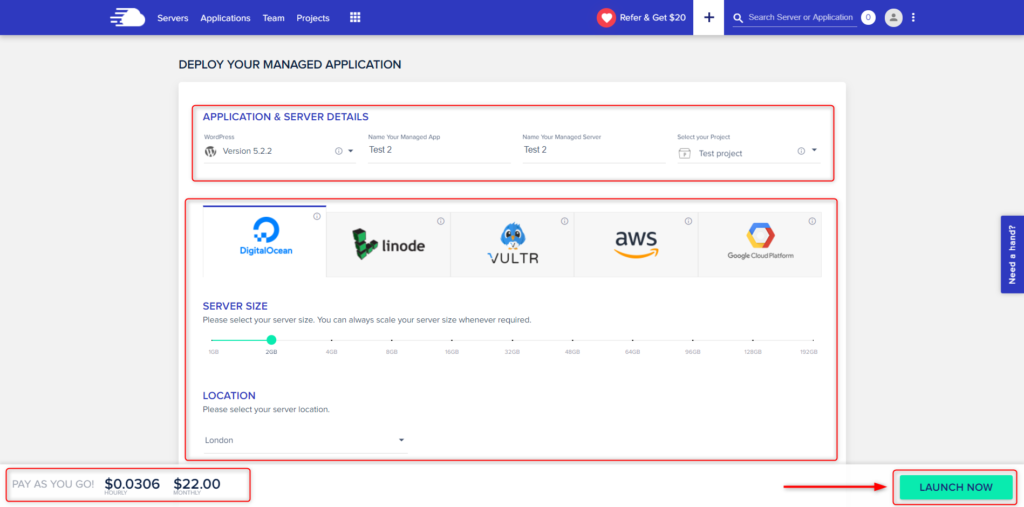
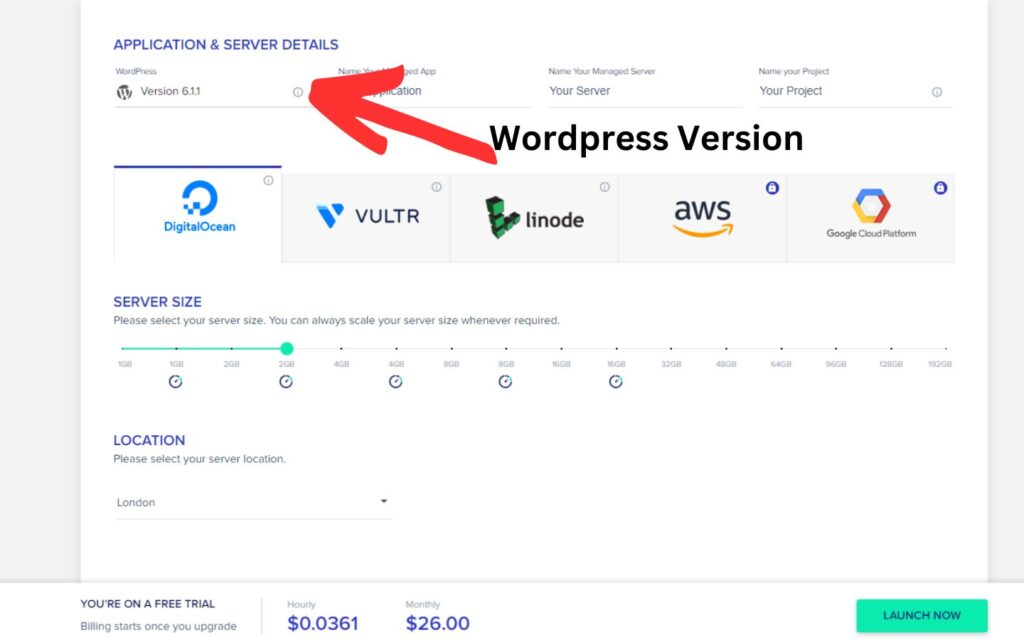
When selecting your server size, it’s important to consider your website’s traffic, content, and other requirements. Cloudways offers a variety of server sizes to choose from, including options for small blogs to large e-commerce websites.
Step 3: Create a New Application and Install WordPress on Cloudways
Once you have launched a new server, the next step is to create a new application and install WordPress. This can be done by clicking on the “Applications” tab and selecting “Add Application” as in the image below.
From here, you can choose “WordPress” as your application and select the server you just launched. Cloudways will automatically install WordPress on your server, and you’ll be prompted to fill in your website details, including your website name and description.
Additionally, you will need to set up your database credentials and SSL certificate to ensure that your website is secure and your visitors’ data is protected. Cloudways makes it easy to set up SSL certificates with just a few clicks, ensuring that your website is secure and trustworthy.
Step 4: Configure WordPress Settings to Improve Your Website on your Cloudways hosting,
It’s important to configure your WordPress settings to enhance your website. This includes setting up your site title, permalink structure, and other basic settings that will affect your website’s SEO. Additionally, you can choose the right theme and plugins that will help you achieve your website goals.
To set up your WordPress settings, log in to your WordPress dashboard and navigate to the “Settings” menu. From here, you can update your site title, tagline, and other basic settings. You can also configure your permalink structure to make your URLs more user-friendly and SEO-friendly.
Choosing the right theme and plugins is also important for your website. Cloudways offers a wide range of themes and plugins that are compatible with WordPress and easy to install. You can choose from free and premium themes and plugins, depending on your needs and budget.
Step 5: Launch Your WordPress Site on Cloudways Hosting
The final step in installing WordPress on Cloudways hosting is to launch your WordPress site. This can be done by clicking on the “Domain Management” tab

From here, you can add your domain name and SSL certificate. Once you have added your domain name and SSL certificate, click on the “Save Changes” button to launch your WordPress site.

Congratulations! You have successfully installed WordPress on Cloudways hosting in just 5 easy steps. With Cloudways hosting, you can enjoy a reliable and user-friendly hosting experience that will help you grow your website and achieve your online goals.
Conclusion: Enjoy Hassle-Free WordPress Hosting with Cloudways
In conclusion, Cloudways hosting is an excellent choice for hosting your WordPress website. With our step-by-step guide, you can quickly launch your WordPress site and start creating high-quality content that will engage your audience. By choosing Cloudways hosting, you can enjoy fast and reliable performance, easy-to-use control panel, and enhanced security.
Moreover, Cloudways offers a range of features that are designed to help you optimize your website’s performance, security, and SEO. With Cloudways, you can focus on your website’s content and let the platform handle the technical aspects of hosting.
So, what are you waiting for? Sign up for Cloudways hosting today and start building your online presence. With our guide, you can be sure that you’ll be up and running in no time, without any technical expertise. Enjoy hassle-free WordPress hosting with Cloudways!
Pingback: Comparing WordPress Hosting Options: Shared vs Dedicated vs Cloud Hosting - davidjfrew.com